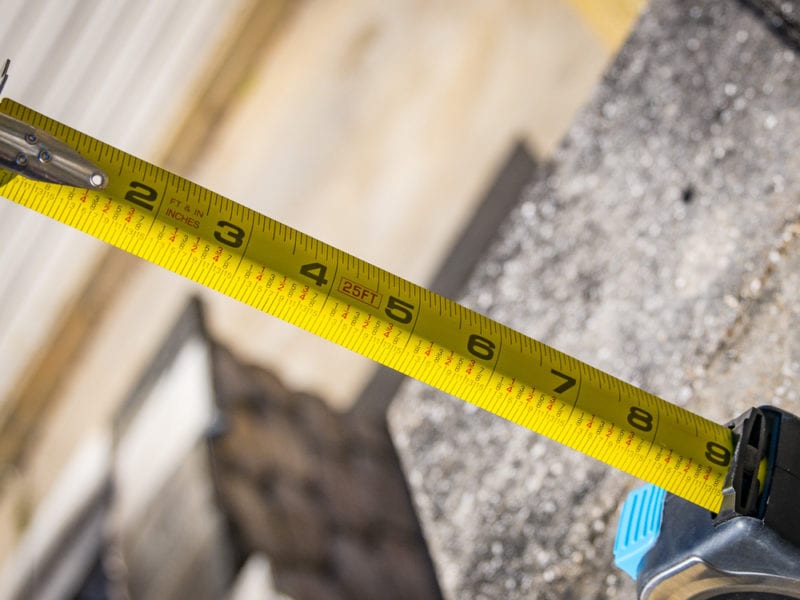
Little, everyday things exist that become effectively invisible to many of us. For example, there’s a small arrow next to the fuel gauge that you’ve probably seen a million times. It actually indicates which side of your car the gas tank is on. Most people know to look at the fuel gauge to check the fuel level. Get in a rental or a borrowed vehicle, however, and most still have a hard time remembering the correct way to pull up to the pump. It’s right there! In the same way, tape measures have markings we often tend to ignore. However, if we know what their purpose is, or that they’re there in the first place, those markings can help us work much more efficiently. Let’s take a closer look at the variety of information tape measure markings give us.
Basic Tape Measure Markings – Feet and Inches…with a Twist!
Markings That Show Fractional Inches
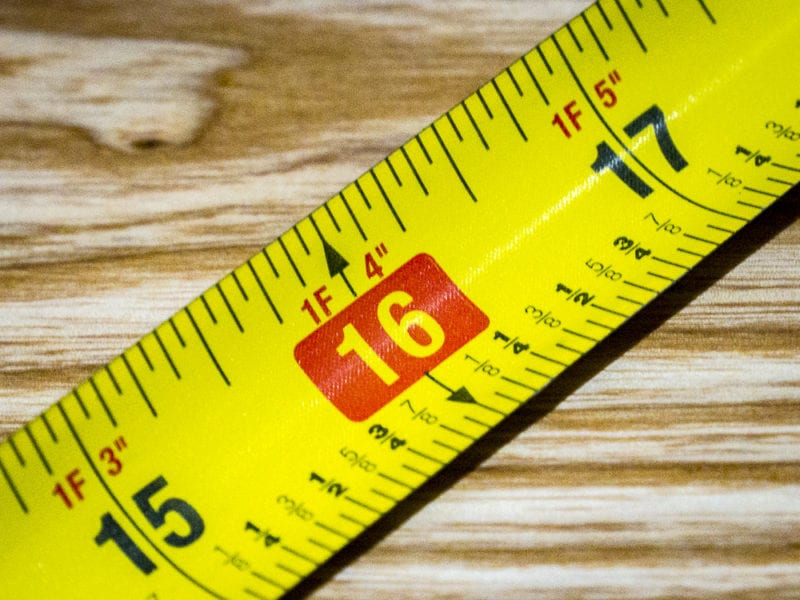
We don’t have to spend much time talking about those markings that everyone uses: inches, feet, and the fractional 1/16-inch hash marks that make them up. But, it’s important to note that not all tapes are created equally. Some have helpful fractions printed in addition to the hash marks (1/8, 1/4, etc).
This lets you quickly red the exact measurement to the fractional value immediately. It eliminates the possibility of “misreading” the tape and looking at the wrong mark.
Markings That Show Feet and Inches
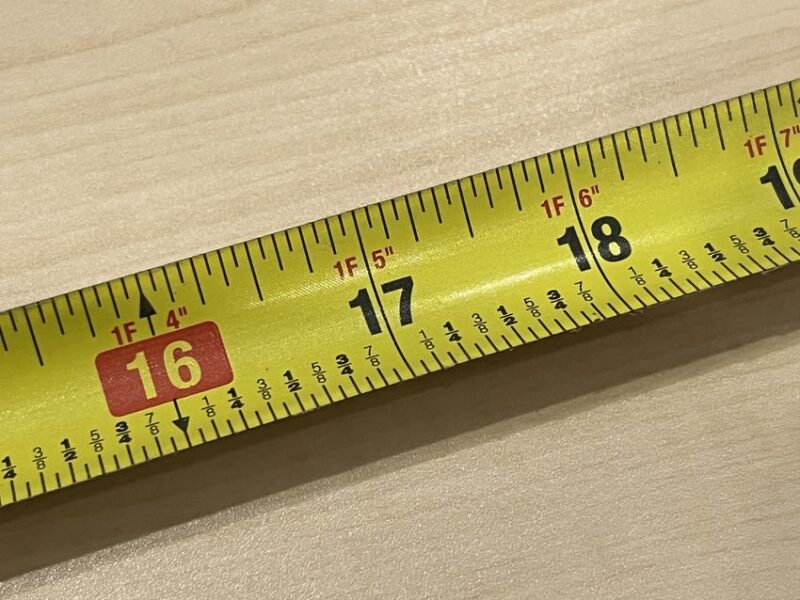
While most tape measures simply show inches, some include markings for feet and inches after the 1-foot mark. For example, you may see a designationof 1F 5″ at the 17-inch mark.
Including Both Imperial and Metric Measurements
Lastly, manufacturers often sell tape measures with both imperial (really USCU units) and metric markings. You may have one on the top of the tape and the other on the bottom. This lets you use the same tape when jumping between measurement scales. It sure beats carrying around two tapes!
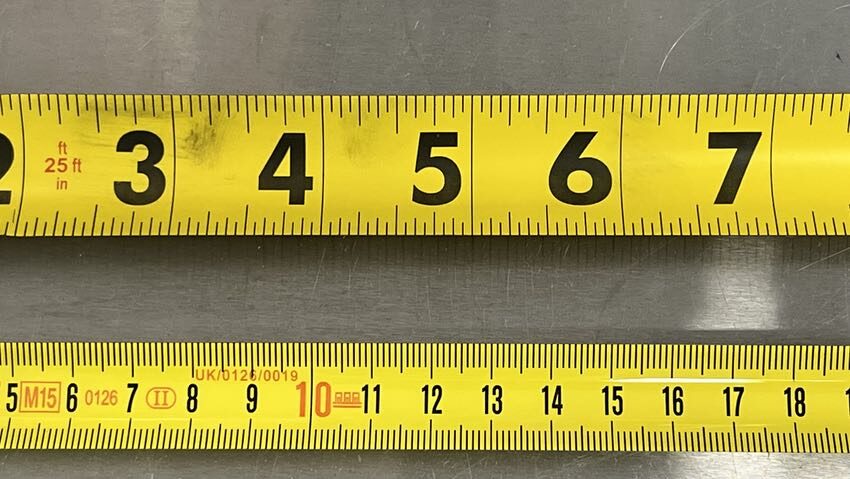
Two-Sided Tape Measures for Vertical and Horizontal Measurements
More common, but no less helpful, are tape measures with markings on both sides for taking both horizontal and vertical measurements. While you can measure vertically with any tape measure, having the numbers oriented vertically makes this task all that much easier.
On these tape measures, the back side has numbers positioned at 90 degrees to the front. This orients them properly when holding the tape measure vertically against a surface.
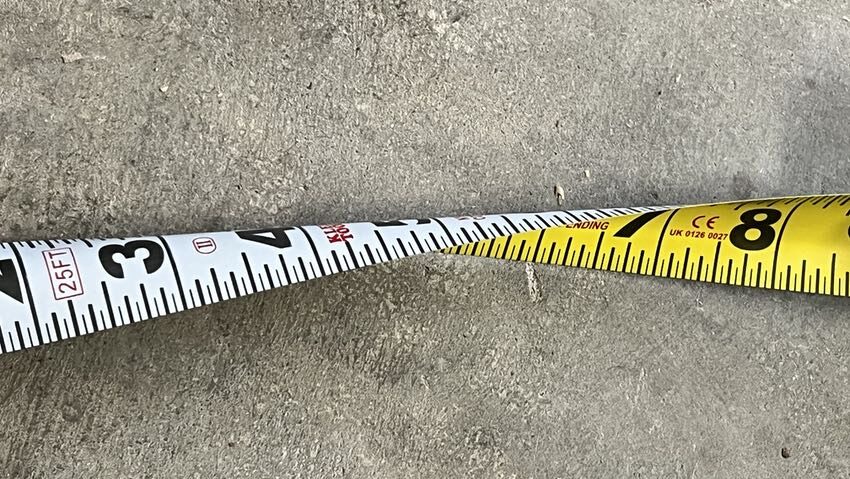
Tape Measure Markings for Layout
One of the handiest tape measure markings comes in the form of color changes at every 16-foot integral. Look at the 16-inch mark on most tapes and you see that it’s set off by color (usually red), size, or both. This crops up again and again at the 32-inch mark, the 48-inch, and so-on.
Why the emphasis? Standard building codes dictate that supporting wall members (studs) must be sixteen inches apart on center. When a builder constructs a wall, these marks make it easy to place studs in compliance with these building codes. This spacing results in seven studs in the 8-foot span of standard sheet goods like drywall and plywood. These markings make it simple to lay out new walls when framing.
Plus, if you can locate one stud in a finished wall, you can quickly find the rest using these stud marks.
Those Mysterious Black Diamond Truss Marks
Of all the tape measure markings, black diamonds get overlooked. When they are noticed, most have no idea of their proper use. In fact, to the untrained eye, they won’t seem to have any rhyme or reason being at 19-3/16, around 38-13/32, then 57-19/32, and so on.
In truth, these black diamonds serve as truss, or black truss, indicators. Whereas the 16-inch markings provide the spacing for seven studs in an 8-foot span, black truss diamonds provide the spacing for six trusses under a standard sheet of plywood.
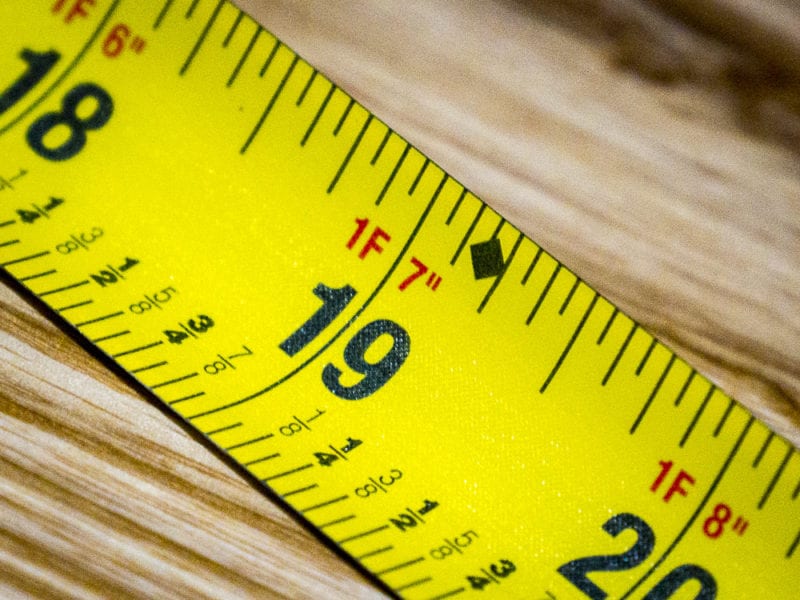
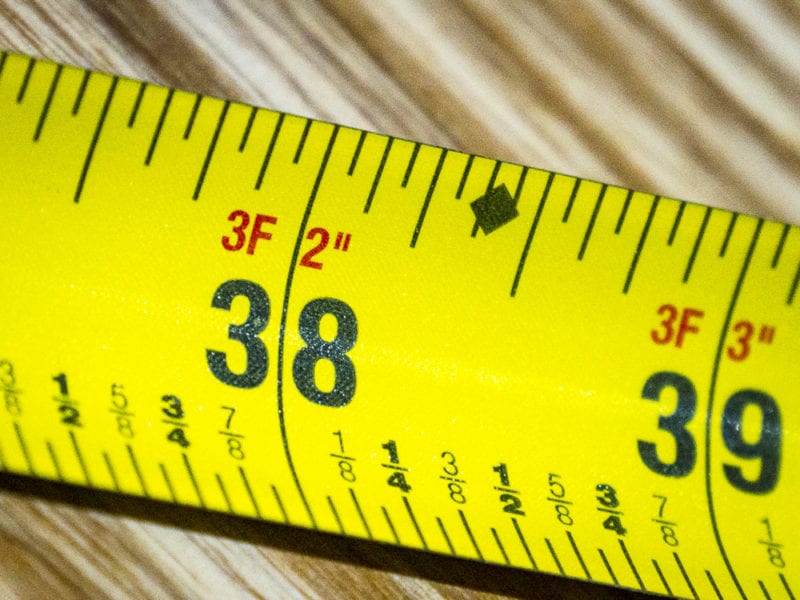
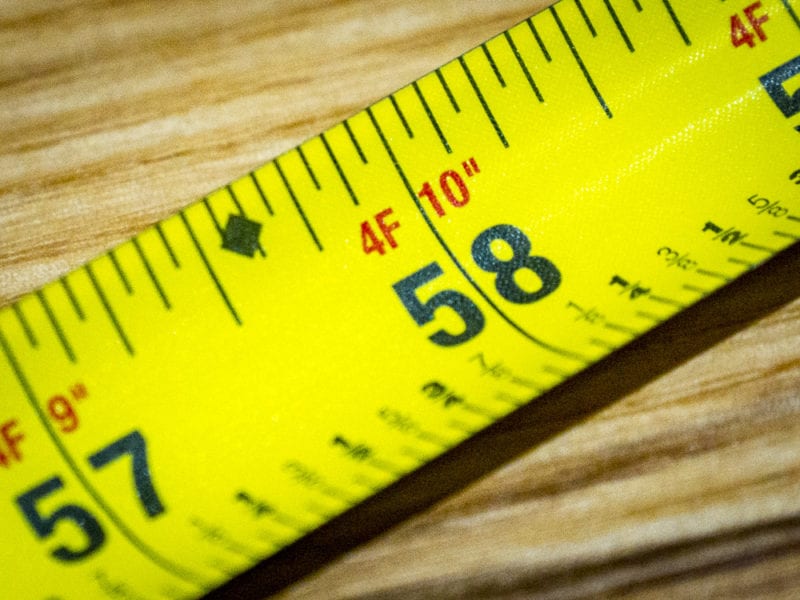
A quick caveat: true black truss diamonds will most likely be found on longer, professional tapes. We have two tapes made by the same manufacturer in front of us right now. The 25-foot tape has true black truss diamonds. The 6-foot tape has black diamonds at the 16-inch center increments. Like we said, just make sure you know what units you’re measuring!
Center-of-Board Markings and Measurements
Some tape measures include markings on the bottom of the tape that measure exactly half of the markings on the top of the tape. This makes it much easier to mark the halfway point of a board.
Above and Beyond the Call of Tape Measure Markings
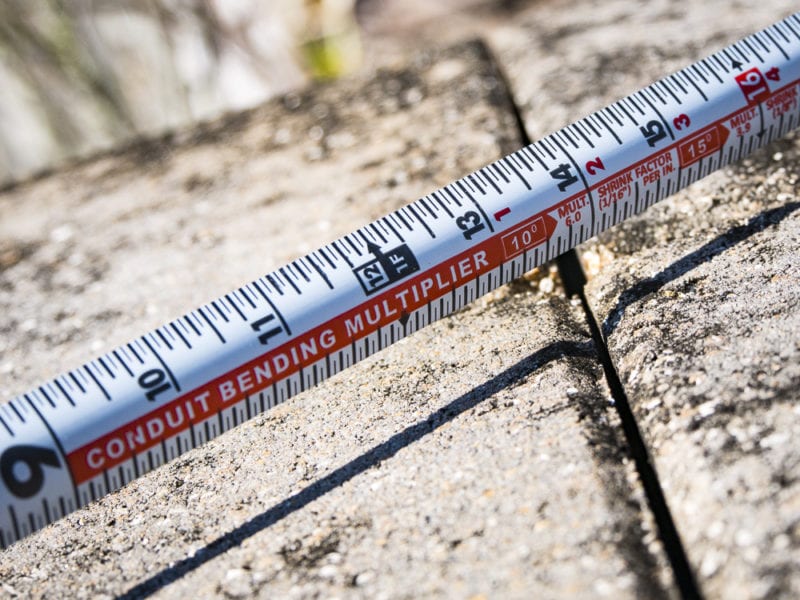
Conduit Bending Multiplier Table
Certain Klein tape measures includes pipe bending schedules and markings. These help you understand where to place your pipe benders in order to achieve particular bends along a pipe. Combined with the curved tape that fits right on the pipe and magnetic end hooks, you get a rather nice package for plumbers!
Architectural Scale
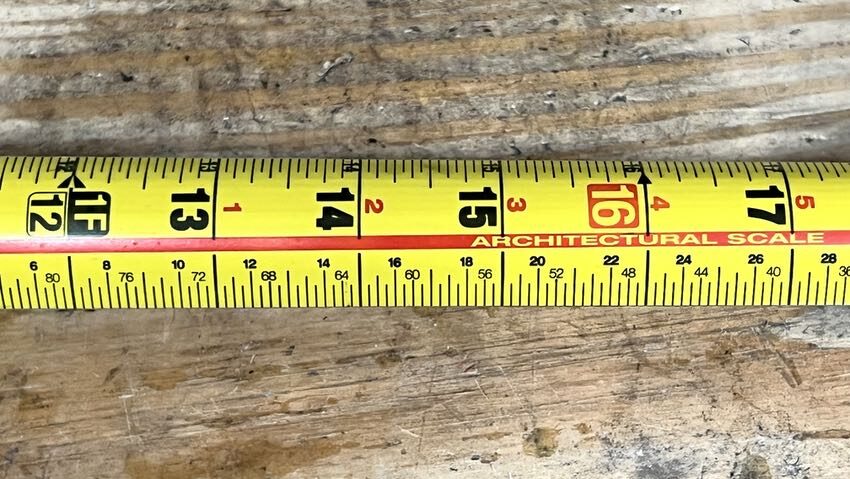
For any of us having to go back and forth from plans to verify measurements, having an architectural scale on the back of a tape can save some time. Some Milwaukee tape measures include this feature on the back. Having a 1/4-inch = 1-foot scale can save you a lot of time when modifying or updating plans on the jobsite.
Final Thoughts
Any tradesman knows it’s best to use the right tool for the job, so we welcome new technology when it improves productivity. We really dig laser distance measures for their speed and accuracy. But, if it wasn’t already clear that laser distance measures are great for broad measuring applications, they’re not necessarily helpful for layout. In this case, despite these technological advancements in laser measuring, our low-tech tape measures give us more useful information. In fact, we’d be way behind the times without our standard, tried-and-true tape measure markings!
If you’re a Pro and you have a tape measure tip, add it in the comments below!

