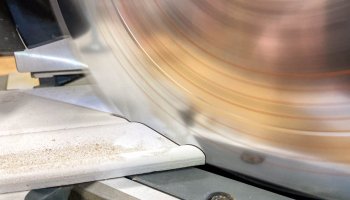
In our article what to look for on a table saw, we told you that the table saw is the cornerstone tool of both the jobsite and shop. It makes the big cuts that are either difficult or near-impossible with other tools. It also does this while offering tabletop support and built-in guides to keep material straight. Still, if you don’t know how to calibrate a table saw, your cuts may never be truly straight.
If a table saw’s components aren’t properly aligned, your cuts won’t be accurate. That applies to cheap saws as well as expensive cabinet saws. Telltale signs of a misaligned saw are raggedy cuts, burn marks on the side of the material, and even extra wear on the motor (as evidenced by an audible “dive” it takes during the cut).
That’s bad enough, but it can also be more dangerous to operate. If the cutting path narrows, the saw is more likely to kickback (send material back at you when it gets launched by the blade). This can happen due to wood getting pinched between the blade and fence. Although ensuring all components are parallel takes a few minutes, it’s well worth the time.
We have a saying around here: It’s wise to de-energize. If you take nothing else from this article, unplug your table saw before calibration!
Calibrate a Table Saw Starting with the Blade
The easiest place to start—and a good maintenance habit to develop—is blade inspection. Be sure there’s no pitch buildup below the teeth. Pitch is the general gunk the blade collects over time. It can be sap or built up adhesive from layered material. In another article, we’ll talk about using solvents to clean pitch from an otherwise good blade. Carefully spin the blade to be sure it’s without bend or warp. If it’s not true, it’s time for a new blade!
Wobble, Wobble
Now gently try to wiggle the blade from side to side. Even an acceptable blade won’t cut true if the arbor that holds it through its center is loose or worn. This wobble is called runout, as in, you’ll runout of material before the blade makes a true cut. That’s not really why, but it’ll help you remember! Tighten the bolt holding the blade onto the arbor if possible. If it’s already tight and the wobble persists, you might need new bearings (or even a new saw!).
Square the Table Saw Blade to the Table and Adjust Bevel Stops
Periodically squaring the blade to the table is another good maintenance habit to develop. Do it at least every time you change the blade. However, since it only takes a moment, consider checking square more often. Use a reliable machinist square or combination square.
Raise the blade to its highest extreme. Stand the square vertically with the 90° against the blade and table. Be sure it’s against the blade’s body only and not resting on a tooth. Hitting the extended kerf from a carbide tooth will skew your squaring. You’ll be able to tell right away if the blade is out of square. In fact, I found my own table saw to be a full 1° out of square using this method!
Checking Your Table Saw Bevel
Next, be sure the bevel gauge registers the proper 0° angle. If not, you want to adjust it as necessary. If you find that the blade simply won’t come into square, adjust the left bevel stop. Consult the owner’s manual for its location.
Next, move the blade to a 45° bevel. With a combination or rafter square, check the angle for accuracy. Since you just squared the blade to the table and ensured the bevel gauge is accurate, expect it to be accurate here. You may want the right bevel stop to terminate the trunnion movement at 45°, so adjust it as necessary like you did the left one.
Square the Blade to the Miter Slot
If you’ve spent a few minutes researching the topic, you’ll know there are several methods for assuring the blade is square to the miter slot. The methods range from simple to sophisticated, requiring simple to sophisticated tools for the job.
Not surprisingly, the more sophisticated the tool, the more accurate the measurement. You can use a precision ruler, calipers, a creative method of your own, or our preference: a dial indicator. Whatever you choose, be sure there is no play in the miter guide as you measure the distance from it to the front and the back of the blade. This reveals how out of square the blade is to the miter slot. The more granular your measurement, the more accurate you can be.
If you find the blade isn’t square with the miter gauge, visualize which way the table will have to move to bring it into square. Using that visualization, determine which of the bolts holding the table (from underneath) is the pivot point of the table’s movement. Without loosening that pivot point bolt, loosen the other bolts (likely three of them, but some have more) just slightly.
Then, using a rubber mallet or dead blow hammer, gently tap the side of the table in the right direction. Tighten one of the loose bolts carefully to avoid moving the table. Measure again and if the blade is square to the miter slot, tighten the remaining bolts.
Square the Blade to the Fence
Squaring the blade to the fence is equally important to cut accuracy and safety. Since our blade is square to the miter slot, squaring the fence to the miter slot will square the fence to the blade. Therefore, using the same measurement method (in our case, the dial indicator), determine if one end of the fence is closer to the blade than the other. Consult the owner’s manual to adjust the ends of the fence.
Although somewhat less critical, put a machinist square against the fence to determine if it’s sitting 90° to the table. Adjust if necessary.
If you’ve made even small adjustments to this point, the improvements to the finish quality of your work will be noticeable. Even small cut inaccuracies can be seen from a distance. You need to put the odds in your favor using a saw with parallel components. But that’s not all you can do. Here’s some extra credit for the over-achievers (you know who you are).
The throat plate (the removable, oblong piece surrounding the blade opening) should be flush with the table. If it’s too high, it will impede the smooth movement of the material over the table. If it’s too low, it might not support the material or it could catch it on the backside of the blade.
Typically the throat plate can be adjusted with set screws from the top. If your saw didn’t come with a zero clearance throat plate, consider replacing it. With zero clearance, small waste shavings won’t get caught between the blade and plate. Moreover, it provides greater support around the cut, resulting in less tear-out and cleaner cuts.
There are several lubrication points on a table saw, including the trunnions which allow the blade to move for bevel cuts. Consult your owner’s manual for location and maintenance schedule to keep moving parts moving!
Finally, keep the table clean and smoother. Don’t let any wood glue or sawdust collect on it and you’ll enjoy many years of accurate cuts! Hopefully, this gives you some solid tips as you figure out how to calibrate a table saw. If you’re a Pro and you have table saw tips, add them in the comments below.
We featured the Skilsaw Heavy-Duty Worm Drive Table Saw in this article. Check out the features and specs below along with the full review here.


